
I am first and foremost a lover of nature. I approach the Christmas tree farm and this bridge project with that in mind (see more info in the Growing Green tab). It was always known that some method of crossing Trout Creek would be necessary. First and probably the easiest option would be a culvert. There are obvious problems with culverts. They can easily be clogged during a heavy down pour and over time are prone to wash out and known to block fish passage. Considering there are beaver present in the creek, this would also give the beaver a great starting point for a new dam and compromise the culvert. The next solution would be to go over the top of the creek. Over the years I had seen ads for railroad flat car bridges in the Capital Press. I always thought this would be the perfect option for our application.
After some research I discovered that the US Forest Service had jurisdiction over this project because we are in a forest zone. First was the application process which required us to describe the project we had in mind and how we would protect the stream and other wetland resources as we executed it. Approval was surprisingly easy, and I encourage anyone wishing to attempt a project like this to contact their state forester.
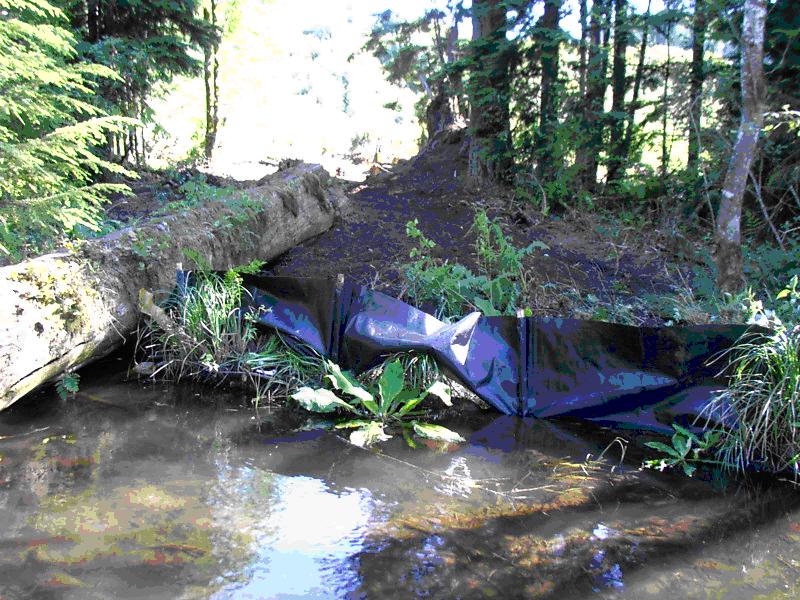
Next was the implementation. The property had been logged about five years prior and we did not have to deal with large timber. We did, however, have to deal with a lot of brush and some lower than anticipated ground. This picture is from mid winter well before we started:

When we started clearing away the brush, we moved equipment to both sides of the creek so we never had to interrupt the natural creek flow. The log you see on the left in the photo below was the main route of egress over the stream. The silt fence was put in place to mitigate erosion.
This is dad working the crawler as we cleared away some of the debris, most of which was pulled out away from the creek.

Here is brother Lee and nephew Sheldon taking a break on the log as we cleared away some brush.

Of course Lucy was there to help. We finally had to put some pink marking tape on her collar as she just disappeared against the background of fresh dirt.

This is my wife Terri coming out to inspect the clearing before we poured the concrete abutments. This is a far cry from where we first began. We brought in some large rock for the base of the concrete, then topped it off with some 1-inch crushed gravel.

They started with the footers first and then the walls on top. Everything looks good, well almost everything. The concrete contractor missed the mark just a bit.

We used a lot of #5 rebar in the footers and forms.

Below is a little better picture of what the forms looked like.

We stepped the walls to accommodate the railcar superstructure. We will place the center point of the wheel trucks over the wall.

I really like the way the concrete abutments turned out.
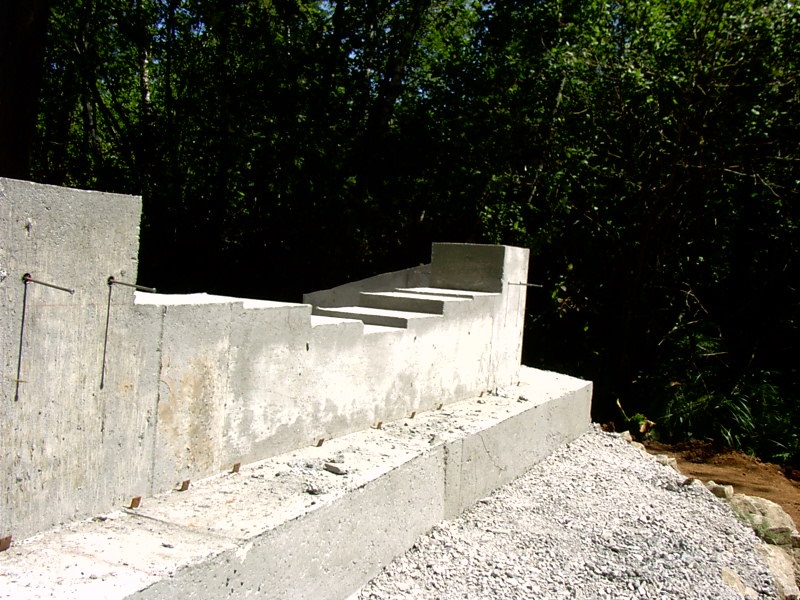
The plan is coming together nicely.

Wait what is that tree on the far right-hand side doing? Did I mention something about the footers missing the mark? I certainly do not blame the concrete contractors, as I didn’t think they needed me to point out exactly where everything needed to be placed. I guess I was wrong. They did a great job, but just missed the mark a bit. Worst case scenario, we will have to take out the tree on the far side.

Now for the railcar. Here is the car the first time I saw it.

I ended up traveling back out to visit the railcar three times making sure I had all the correct measurements for the footers.
Here are the new deck boards for the bridge. These boards consumed a large amount of time as each board was notched to fit a specific location on the bridge.

Finally on installation day, the crane arrived.

After three hours of set up the crane was finally in place and the railcar arrived and was ready to go. In the photo below they are making the first lift off the delivery truck.

They placed the car on the ground upside down. Then they lifted it on one side and flipped it over. Here is the final moment as they put it into place.

Here we are on the newly-installed railcar.

This is where those stepped footers really start to make sense.

Next up: removing the old deck and installing the new timbers. The new deck is 4-inches thick and the boards are 14-feet long. There will also be a curb installed using 8” x 8” timbers and when finished the curb will be at a final height of 16 inches. The driving width is a full 12 feet wide.
I don’t have any pictures of the stripped down bridge or of the timber installation. I have to say again, that the timber notching and drilling took a lot longer than I ever thought. A super huge thanks to my father for his many weekends of hard work and basically taking the lead on this portion of the project.
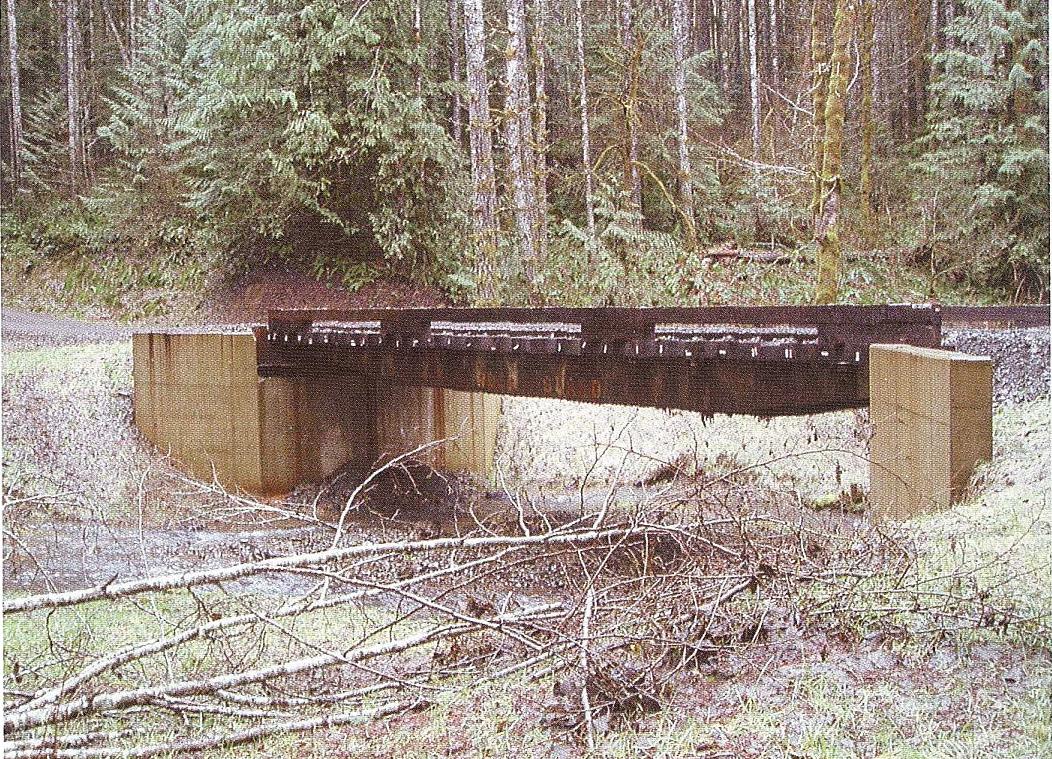
I had a picture in my mind of what I wanted the finished project to look like. I found a copy of just that image in Managing Woodland Roads, a Field Handbook (Oregon State University Extension Service, 2006), page 46:
Here is what the finished project looks like:

From the top side:

The last phase was grading and building the approaches on both sides of the bridge. This included laying some rock to keep from getting mud on the bridge that would then get washed into the creek. The timbers were then removed and sent out to be treated, after which they were re-installed. Finally, we installed some 2′ x 8′ runners on the bridge in the wheel tracks. This way when the crawler, with its steel tracks, drives over the bridge, it will not damage the main timbers. This should also make the drive over the bridge smoother.
I hope all who read this get some enjoyment or value out of the information about this project. Feel free to contact me if you have any questions.
Tom
[/av_textblock]